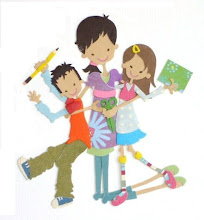
So, Little Papercuts artwork is on hold at least for another year. I would like to get back to it earlier than that, but the realist in me knows that with my tiny little terror still in the house any kind of paper artwork will have to wait until she goes to kindergarten (thankfully when she starts, kindergarten will be full day as opposed to half day or alternate days!). However, all crafting has not ceased in our house because that would just be crazy :) I can't wait to show you all what we've been up to, but it'll have to wait for now...the mini is talking to me on a play cell phone and waving something in front of my face. I guess some things never change;)
Saturday, April 14, 2012
playing catch up
So, Little Papercuts artwork is on hold at least for another year. I would like to get back to it earlier than that, but the realist in me knows that with my tiny little terror still in the house any kind of paper artwork will have to wait until she goes to kindergarten (thankfully when she starts, kindergarten will be full day as opposed to half day or alternate days!). However, all crafting has not ceased in our house because that would just be crazy :) I can't wait to show you all what we've been up to, but it'll have to wait for now...the mini is talking to me on a play cell phone and waving something in front of my face. I guess some things never change;)
Tuesday, November 2, 2010
we now return to your regularly scheduled program
Did you notice we were gone? We've been MIA the last couple of weeks, prepping for Halloween kept me pretty busy (I decided to take on the task of making a Little Red Riding Hood costume for my eldest...more on that later), but things have settled down considerably. Thank goodness for that!
Seriously, where does all the time go? Do you ever feel like you have no time to do anything, and spend all your time doing nothing, missing out on all the little moments? That's how it's been here lately. Oh well, what can you do? I promise not to be missing for so long again, and there's lots of new stuff to fill you all in on, so stay tuned friends :)
Thursday, August 5, 2010
{embrace} the camera thursday

Haha! I bet you thought I forgot...not so! Here's me and the mini papercut in my sister's backyard. Link up with Emily and show your camera some love:)
Friday, July 30, 2010
diy paper moustaches
Did our moustaches make you giggle yesterday? Well, I thought it would be fun to do a little DIY for those of you with funny monkeys in the house. These are really easy to make, and you probably have all the materials lying around your house already! So here we go...
You'll need black scrapbook or construction paper (or the colour of your choice), bamboo skewers, glue, tape, a pencil and scissors.
Step 1: Draw a moustache on a sheet of paper and cut it out. You can draw them free-hand or find an image from the internet if you aren't comfortable drawing it yourself. This will be your template to ensure all of your moustaches are the same shape and size.
Step 2: Fold your sheet of black paper in half and trace your moustache. Cut it out. You should now have 2 moustaches that when put back to back, line up perfectly.
Step 3: On the back of 1 moustache secure the pointed end of the bamboo skewer using a small piece of tape. If you have a hot glue gun, add a dab of hot glue for extra insurance that the skewer will not wiggle around.
Step 4: Apply glue to the back of the other moustache and stick it to the moustache with the skewer attached so that the bamboo skewer is sandwiched in between. Press out any air bubbles around the skewer and smooth out the moustaches. Let dry.
Step 5: Trim any access paper around the moustache, and voila! You're done!
You can make them any shape, size, colour...it's completely up to you. We found that bamboo skewers worked the best, but you could use popsicle sticks, drinking straws or pipe cleaners too. I also found that scrapbook paper is better than construction paper, because it's thicker and won't buckle or curl up when the glue is applied, but construction paper will work if that's all you have.
Hope you all have fun making your moustaches this weekend, we love ours. Can you tell?
Thursday, July 22, 2010
{embrace} the camera thursday
Here we are, me and my girls:) Yeah, I know you can't see my face, but heck, the top of my head counts, doesn't it? Embrace that camera ladies and gents! You're kids will be happy you did! Remember to link up with Emily here.
Thursday, June 10, 2010
{embrace} the camera thursdays
I was so busy today I almost forgot to post this! Here I am with all the little papercuts after dinner time.
Hope everyone got out their cameras too! Remember to link up over at Emily's blog...Happy Thursday everyone:)
Wednesday, March 24, 2010
winter meet spring
It looks like winter is ready to pack up and leave (even though it snowed yesterday for about half an hour) and we might just be seeing the beginnings of sunshine ahead. We are really looking forward to shedding all our layers and snowsuits, even if it means we'll be trading them in for raincoats and umbrellas. Hey, anything has got to be better than all the salt and slush!
I've already started a lot of our spring cleaning, and it feels good to be purging the baby clothes that the mini has outgrown, as well as snowsuits, boots and toys that have seen better days. We got a new rug for our entryway, and tomorrow I'd like to pick up some new floor mats for the kitchen. Every few months we go through the kids' toys and donate the ones they aren't playing with anymore. The house always feels lighter and more organized after we've done it, and now with a third little rugrat with her own pile of toys, the house feels like it's due for a good overhaul.
With the departure of winter we can pack away all our gear that has cluttered up the front hall since November...skates, helmets, boots, snowsuits, hats, gloves, scarves, heavy jackets. I love the winter months, but we are all impatiently awaiting the warm weather, and I think it might be on it's way! Keep your fingers crossed:)
Saturday, March 13, 2010
start small
I have big hopes for Little Papercuts.
Over the past few years I've come to realize that while it would be wonderful to have a website, a blog can be a great forum to promote your work.
I would love to have a a big airy (read organized) studio space, separate from my kids' play space, but it's nice to be able to watch 'Twilight' as I work and listen to the chatter of my funny monkeys:)
Even though being busy with artwork is something I enjoy, I am content to put it on hold because the mini papercuts are only young once, and I don't want to miss even a second of it.
I really need to get my etsy shop up and running, even if it means only offering 5-10 custom orders a month in the beginning. (Yes muffin, I hear you and I know you're right)
Word of mouth can be a girl's best friend, and really help out the pocket book. I am lucky to have such wonderful customers, family and friends!
If you have a great product, it will speak for itself. Start small and dream big...yup I think that's right:)
Friday, March 5, 2010
almost, but not quite
© 2010 little papercuts
I'm trying to get back to work. Everything that I've tried to use as a substitute is not really filling the void. I finally dragged out my makeshift light table and I'm determined to finish up some artwork that I had started for my niece while I was pregnant, before my belly got in the way. I 'm not sure if I'll be able to devote enough time and attention to Little Papercuts, but it's a start. I had high hopes that by now I'd be back to work and whipping through orders while the mini papercut watched, content to play on her own and watch from her bouncy chair. That is obviously not the case.
Even though I've found the time to sew, I have come to realize that not having an actual studio space to do papercut stuff (and working in a medium that is prone to fly off the table if someone walks past me at a brisk pace, causing a gust of wind) could become a bit of a challenge.
For those of you who are patiently awaiting my official return to work, I say 'Thanks'. I promise I will return, I'm just not sure as to when that will be. Sorry :( Hopefully it'll be soon!
Monday, March 1, 2010
a b c d e f g....

I made this a few years ago, but I thought since I wasn't doing anything papercut related, it might be nice to give you all a little peek at something I made for my daughter a while back. Enjoy!
Thursday, January 7, 2010
cardboard birthdays
"No matter how many toys you have, kids will inevitably want to play with the cardboard box the toy came in more than the toy itself."
Haven't we all heard this before? Here at Little Papercuts, we've taken this sentiment to a whole other level :) Our 'Cardboard Birthdays' began when my son turned one. To accompany our farm themed party I made a tractor out of large cardboard boxes...nothing fancy, just a few boxes put together to form a tractor shape and large enough that a few small children could climb inside to 'drive'. We used large plastic serving trays for tires and voila, instant tractor. Well, to say the kids enjoyed themselves would be an understatement! They had so much fun climbing all over that thing that it almost seemed a shame to throw it out. But it gave me inspiration for the next few birthday parties that would follow
I loved that the basic items we used were so simple (cardboard boxes, paper/plastic plates, coloured paper, paint, hockey tape and glue), and with a little bit of creativity they were transformed into some of my son's favourite cartoon characters.

When Alex turned 2 he was obsessed with Thomas the Tank Engine, so I grabbed 2 boxes from U-Haul (this ensures that the boxes are new and clean since the kids will be inside them) and a cardboard cement tube from Home Depot and put together a train that the kids could play in.


The passenger cars were just smaller boxes cut in half that they could sit inside. We made a light house out of more cardboard and construction paper, and our paper lantern shade was transformed into Harold the Helicopter. The kids and all the adults were thrilled with our efforts, and I knew that this party would be hard to beat...enter Lightning McQueen:)


Thomas was followed by Cars when he turned 3. By far the most challenging of all the parties I've done because I didn't want the cars to be square. But by scoring the cardboard from the inside I was able to achieve a rounded car that everyone fell in love with.


We made 3 cars that year, since he was turning 3, Mater the tow truck, Sally the Porshe and Lightning McQueen the race car. Alex was so thrilled with this party, that he chose Cars again for his 4th birthday, and I took a break from making cardboard characters (I wasn't about to make anymore cars...they take up a lot of space!)
Last year marked the last 'cardboard birthday' I will ever make for him (now that he's in kindergarten he wants large parties with all of his classmates). I chose WALL-E to celebrate Alex turning 5, mostly because I love that movie, and also because I anticipated that it would be relatively simple since WALL-E is square :)
With one large cardboard box, some extra cardboard shaped into teardrops and accented with plastic plates for his eyes, paper towel cardboard tubes for his arms, aluminum elbow duct pieces for his neck, rubber floor mats for his treads, and a bit of paint, WALL-E couldn't have been more perfect! We made it big enough that the kids could sit inside of WALL-E's trash compacter, and we even made his little cockroach friend who sits on his shoulder.
Again we utilized our paper lantern shade, this time transforming it into Eve, simply by adding a balloon suspended with fishing line for the body and some white poster board cutouts for arms. I loved this party, and so did my son:)
Even though these projects took a lot of planning, I will miss them :( No matter how much work they were, the look on my son's face the mornings he woke up to find Thomas the Train and Lightning McQueen sitting on our kitchen table, or WALL-E sitting outside his bedroom door will forever be etched in my mind. Complete Joy :)
Saturday, January 2, 2010
my blue bird
© 2009 Jo-An Yu
With the completion of the master bedroom/nursery drawing to a close (I will be posting pics soon), my eldest has been asking for an 'upgrade' on her room. While I am very fond of A's room, it may be time for a bit of a renovation. Considering that her room is currently pink and green, and her favourite colour is blue does weigh heavily into the equation.
image courtesy of decorpad
So the search begins for the perfect blue decor for my blue bird tween, shifting gears from yellow and grey goodies and adornments to blue and brown with a hit of citrus green...no rhyming intended ;)
Friday, January 1, 2010
hello 2010
Happy New Year Everyone! We had a wonderful 2009, topped off with the birth of our youngest daughter in October. We look back at a year filled with joy and laughter, and a few bumps along the way, but we're eager to start fresh and see what 2010 has in store for us. I send a heartfelt 'Thank You' to all of you who have joined us and stopped by to see what we've been up to here at Little Papercuts. I can't wait to see what kind of fun and mayhem lie ahead! Wishing you all a fabulous and properous new year!! XOXOXO
Thursday, December 24, 2009
no fireplace, no problem
As the big day quickly approaches, things are abuzz around the Little Papercuts home. The tree is decorated and the presents are wrapped, but every year we struggle to find a place to hang our stockings, since we are without a fireplace. Over the last few years I've been wanting to turn our bookcase into a makeshift fireplace for the kids at Christmas, but I've always run out of time and in the end our television cabinet plays home to our kids' stockings. But since Christmas dinner is at a friend's house this year (they're giving us a break since we have a new baby), and because my niece and nephew will be celebrating their first Christmas with us (yes, Santa will be visiting them here), I figured I'd try to come up with something that resembled a fireplace so we could hang all FIVE stockings from it.
So I used some poster board, some scrap booking paper, a glue gun, some tape, ribbon, a hole punch and my trusty scissors and...voila, a cute little fireplace, complete with a roaring fire. It was very easy to make and relatively quick to assemble. While ours is pretty simple, you could definitely be more elaborate and make the fire 3-dimensional by using tissue paper for the flames and paper towel rolls for the logs in the fire. But since we have 3 kids under the age of 1 year, it didn't seem practical to have something they could potentially rip apart and eat:) This can easily be utilized in any space, and when you're ready to put it away it rolls up to be stored until next year. And the best part about it is that it hides all the toys and books for a few days, and 'warms' up the room for the holidays:)
Sunday, November 8, 2009
big thanks

Last week I was lucky enough to have our nursery featured on a few blogs, so I'd like to say a big 'Thank You' to Little Miss Heirlooms, Kenziepoo and Ohdeedoh, not to mention all of the wonderful people who commented. The nursery love is very much appreciated!
Monday, November 2, 2009
at last...
Our nursery nook is complete, and I love it! Although it only consists of a dresser/change table, a crib and a wall shelf (all from Ikea), I think we were able to create a whimsical space for the mini papercut that doesn't take up a lot of space, but delivers huge impact within our master bedroom.
Although the rest of the bedroom is still 'under construction', my little Zoe has a corner all her own. I wanted a space that was created solely for her, and even though the colour palette of the room and the pattern of the crib bedding is not typical of what you'd find in a child's bedroom, by utilizing elements that appeal to my husband and myself, her nook is definitely something we enjoy having in OUR space! Having said that, the addition of a bold floral mural and a few playful pieces here and there makes it decidedly HER space:)
I enjoyed every moment of decorating the mini papercut's nursery. I wanted it to be beautiful and charming, while still feeling clean and modern. Keeping the furniture simple and adding whimsical touches keep the nook from feeling cluttered and overdone. I also love the idea of using items that you wouldn't normally associate with a kid's space for organization and display.
We used a leather desk organizer as a diaper caddy, and a vintage sugar container to hold things like nail clippers, pacifiers, and other odds and ends. A pastel yellow candy dish is the perfect place for washcloths and keeps them in close reach. And one of my favourite finds is the table lamp that doubles as a nightlight that somewhat resembles a milkweed pod.
I also wanted to re-use an old shelf from Ikea that my husband had in his office. I thought the space needed a bit of sparkle, but I didn't really want to purchase a new shelf when I had one that was perfectly fine, although not that attractive. I was inspired by this post on Apartment Therapy, and figured it might be a great solution for the shelf. Much to my surprise it looked amazing, and when the nightlight is on, it reflects some of the light throughout the room.
Other little touches that personalize the space include the paper butterfly garland, the name art above the dresser and the paper flower bouquet. My mini papercut definitely has a corner of the room that belongs only to her. I'm just happy we get to share:)
Items in the Nursery Nook:
Paint Colour: Midnite Hour by CIL Dulux
Hemnes Dresser from Ikea
Gulliver Crib from Ikea
Didi Citron yellow + white fabric from Tonic Living
Amy Butler Grey Wallflower yellow + grey fabric from Cotton Thread Fabrics on etsy
Amy Butler Yellow Full Moon Polka Dots fabric from Cotton Thread Fabrics on etsy
Owl Bookend by Zuny
Jubilee the lamb from doggiepiggie on etsy
Socko the sock monkey from Muffin Top Designs on etsy
Milkweed lamp, pastel yellow candy dish, leather desk organizer, vintage sugar container all from Home Sense
name art, paper butterfly garland and paper floral bouquet all by Little Papercuts (that's me;) )